
A strong and adaptable method utilized in numerous building, renovation, and maintenance projects is concrete core drilling. Core drilling provides access to crucial locations without compromising the structural integrity of the surrounding material by removing cylindrical pieces of concrete.
This in-depth manual will explore the nuances of concrete core drilling, go over the preparations required for a job well done, and offer a helpful, step-by-step tutorial for learning the skill of freehand coring.
Core drilling: What is it?
Cutting through concrete, asphalt, or other dense materials to generate cylindrical holes known as cores is known as core drilling. A specialized core drill machine and core bits with diamond tips are used in the procedure. These pieces progressively remove the material, leaving behind a precise and clean hole.
The development of core drilling, a game-changing answer to the problems of producing precise, clean holes, changed the building industry. Prior to core drilling, conventional techniques like hammering, chiselling, or using pneumatic tools frequently produced time-consuming and untidy results. Core drilling caused a paradigm shift by allowing experts to work quickly and effectively while producing accurate and clear data.
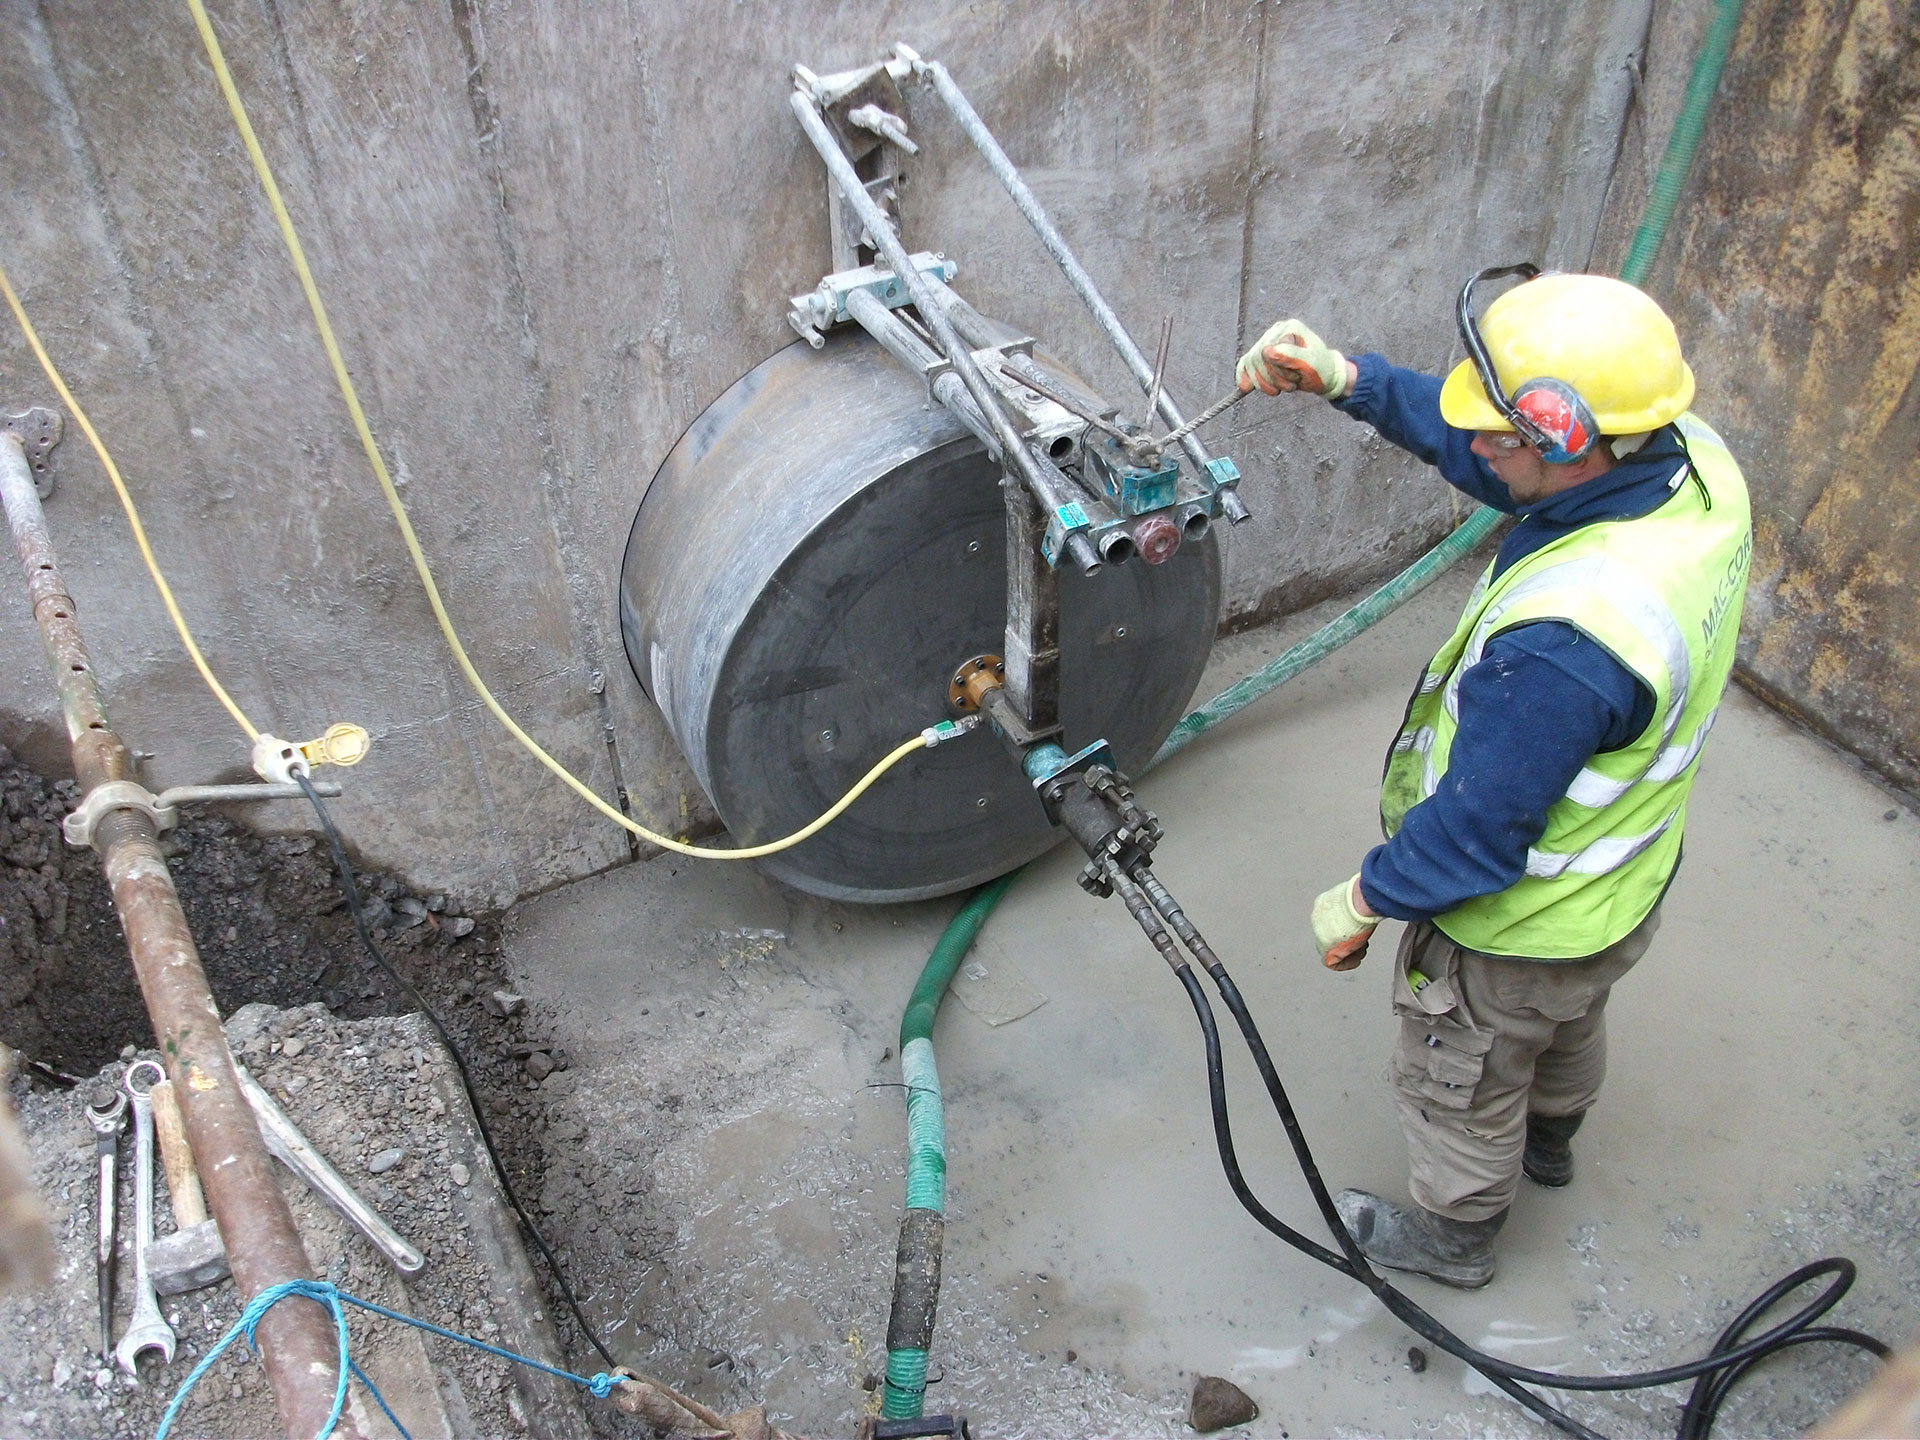
What Happens During Core Drilling?
Core drilling machines drill into the surface using a rotary motion. The drill bit revolves and grinds through the concrete with the help of the machine’s motor. The core, or extracted material, is gathered inside the hollow centre of the bit as the drill moves forward. During drilling, water is frequently used to cool the bit and reduce dust.
Why Would You Use Core Drilling?
In comparison to conventional drilling techniques, core drilling has many benefits. It is the best tool for cutting holes in concrete for plumbing, electrical, and HVAC systems because of its accuracy and clean cutting capabilities. It enables the collection of whole samples for testing.
Additionally, anchor points, ductwork holes, and utility channels are frequently made via core drilling.
Getting the Work Area Ready
For safety, effectiveness, and accuracy, complete work area preparation is essential prior to starting any core drilling operation. These are the actions required to guarantee a well-organized work area.
1. Make the Area Clear: Clear the work area of any debris, items, or other potential obstacles. Drilling activities will run more smoothly in a tidy and ordered environment.
2. Identify Utilities: Before drilling, it’s important to find and designate any underground electrical wires, water pipelines, or other utilities that may be in the way. For correct identification of these components, use utility detection tools or refer to blueprints. This action is essential to avoiding drilling-related harm to critical infrastructure.
3. Mark the Drilling Points: Carefully measure and mark the drilling locations that you want to use. Mark precisely where the holes will be placed with a pencil or chalk. Drilling will be more accurate if markers are clear and apparent.
4. Protect the Area: To prevent unwanted access, create a restricted zone around the work area using caution tape or obstacles. This will improve security and reduce the possibility of mishaps when drilling.
Getting the Machine Ready
For a good core drilling services, the drilling equipment must be prepared properly. Here are the crucial actions to take to make sure the machine is prepared for use:
1. Choose the Correct Core Bit: Choosing the proper diamond core bit is essential when starting a core drilling project. To obtain the best outcomes, factors including drilling depth, material type, and diameter should be taken into account.
2. Mount the Core Bit: Mount the selected core bit firmly to the drilling device in accordance with the guidelines provided by the manufacturer. To avoid mishaps or slippage when operating, a snug and secure fit is essential.
3. Check the Machine: Before getting to work, give the drilling machine a complete inspection. Look for any missing pieces, frayed cables, or broken parts. It’s crucial to check that the machine functions properly and that all of the safety features are operational.
4. Connect Water Supply (if Applicable): A continuous water supply is required in certain drilling circumstances, such as when drilling into reinforced concrete, to cool and lubricate the core bit. Connect a water source to the drilling device if necessary. A sufficient water supply reduces overheating and lengthens the diamond bit’s life.
Detailed Instructions for Freehand Coring
When drilling holes in horizontal or vertical surfaces without using a drill stand or rig, the technique used is called freehand coring.
The first step is to precisely mark the drilling point on the concrete surface using a pencil or chalk. Measure the area and check that the mark is clear.
Step 2: Set Up the Machine – With both hands, firmly hold the drilling machine while lining up the core bit with the designated drilling spot. Throughout the procedure, keep a steady and centred posture.
The next step is to activate the machine by following the manufacturer’s instructions. When beginning the machine, keep a firm hold on it to maintain control and stability.
Step 4: Apply Steady Pressure – Apply steady downward pressure while pressing the core bit against the designated drilling spot. Refrain from using too much force as this could result in loss of control or damage to the core bit.
Step 5: Start Drilling – Slowly raise the drilling machine’s speed while applying constant pressure to the core bit. Allow the core bit with a diamond tip to gradually cut through the concrete. It’s crucial to let the tool work naturally rather than pushing it.
Step 6: Monitor Progress – Pay particular attention to the speed, pressure, and rotation of the core bit as you drill. To keep the drilling motion continuous and smooth, alter the pressure and speed.
Step 7: Remove Dust and Debris – Remove the core bit from the hole periodically to remove built-up dust and debris. This process enables improved drilling site visibility and helps prevent clogs. To efficiently clear the dust and particles, use a brush or a vacuum.
Step 8: Finish Drilling – Keep drilling until the desired depth is reached. Be aware of any fluctuations in resistance or vibration since they could point to changes in the density of the concrete or the presence of reinforcing steel. Throughout the drilling process, control and stability must be maintained.
Step 9: Remove the Core – Once the hole has been drilled, turn off the machine and carefully remove the core bit. Be careful not to damage the core or the hole’s margins.
Step 10: Check and Finish – Check the drilled hole to make sure it satisfies the necessary requirements. If required, use a chisel or grinder to polish any jagged edges near the hole. Clean up the area and properly get rid of any trash.
Conclusion Concrete core drilling is a potent method that has completely changed the way holes are made in concrete and other tough materials. It has completely transformed the building sector. Core drilling, which uses specialized tools and diamond-tipped core bits, has many advantages, such as precision installations, sample extraction for testing, and the development of utility channels.
Individuals can unlock the precision and efficiency required for successful core drilling while guaranteeing structural integrity and obtaining desired results by adhering to suitable preparation practices and learning the art of freehand coring. Concrete core drilling is a crucial tool for building, remodelling, and maintenance projects, whether it’s for anchor points, openings, plumbing, electrical, or HVAC installations.
If you’re looking for concrete core drilling services in Brisbane and its surrounding areas, our concrete coring and cutting services are up to the task. Contact Cutrite today so we can discuss your project.